[UEFI]mdadmによるRAID1 – 復旧方法 –

以前 BIOS から起動するシステムにおいて、mdadmにより構築しているRAID1のディスク故障時のディスクの交換方法を書いた。([BIOS]mdadmによるRAID1 – 復旧方法 –

今回は UEFI で起動するシステムでの復旧方法を記載する。

  1. 前準備(UEFIモードで起動できる仮想環境の準備)
    最初VirtualBoxの「EFIの有効化」という拡張機能を用いて試してみたが、次のサイトにも書かれているように「VirtualboxでUEFI有効にしてDebian入れたら二度目には起動しない。お前さっきまで起きてただろ!」、一度シャットダウンすると起動できなくなるという問題があり、検証に利用することができなかった。そのためVMware Workstation Playerを利用した。通常ではBIOSモードで起動するが、.vmxファイルに「firmware = “efi”」を追記するとUEFIモードで起動できるようになる。準備ができたら、HDDを二つ接続してRAID1構成でインストールを行う。ここの手順は割愛する。ちなみにインストールした際のパーティション構成は下記のとおり。

    Disk /dev/sda: 21.5 GB, 21474836480 bytes, 41943040 sectors
    Units = sectors of 1 * 512 = 512 bytes
    Sector size (logical/physical): 512 bytes / 512 bytes
    I/O サイズ (最小 / 推奨): 512 バイト / 512 バイト
    Disk label type: gpt
    Disk identifier: 70C4696F-C25D-48D2-AC5A-20C23E2C863E
    
    
    #         Start          End    Size  Type            Name
     1         2048     35237887   16.8G  Linux RAID      Linux RAID
     2     35237888     39434239      2G  Linux RAID      Linux RAID
     3     39434240     39843839    200M  Linux RAID      Linux RAID
     4     39843840     41940991      1G  Linux RAID      Linux RAID

    1がルート、2がスワップ、3がEFI、4が/bootの領域

  2. HDDを故障させ復旧する
    この手順は以前の「[BIOS]mdadmによるRAID1 – 復旧方法 –」での手順と変わらないのでこちらを参照し、「・物理デバイスを故障させる」から「・RAIDデバイスへ新しい物理デバイスの追加」までの手順を実施する。
  3. 新しいHDDから起動できるように設定する
    uefiブートでは下記のように起動順序が設定されている。

    # efibootmgr -v
    BootCurrent: 0006
    BootOrder: 0006,0005,0000,0002,0003,0004,0001,0008
    Boot0000* EFI VMware Virtual SCSI Hard Drive (0.0)      PciRoot(0x0)/Pci(0x10,0x0)/SCSI(0,0)
    Boot0001* 耀෶   PciRoot(0x0)/Pci(0x10,0x0)/SCSI(0,0)/HD(3,GPT,9d1fb208-a4e6-4e43-bda0-182660a0621b,0x259b800,0x64000)/File(\EFI\centos\shimx64.efi)
    Boot0002* EFI VMware Virtual IDE CDROM Drive (IDE 1:0)  PciRoot(0x0)/Pci(0x7,0x1)/Ata(1,0,0)
    Boot0003* EFI Network   PciRoot(0x0)/Pci(0x11,0x0)/Pci(0x1,0x0)/MAC(000c2985f175,0)
    Boot0004* EFI Internal Shell (Unsupported option)       MemoryMapped(11,0xcb3a000,0xcfa0fff)/FvFile(c57ad6b7-0515-40a8-9d21-551652854e37)
    Boot0005* CentOS        HD(3,GPT,765b2167-fa3c-45b1-94d2-e0f3c0adc4d8,0x259b800,0x64000)/File(\EFI\centos\shimx64.efi)
    Boot0006* CentOS        HD(3,GPT,c1304ebe-93b7-4cba-9ee0-a35306fb67b2,0x259b800,0x64000)/File(\EFI\centos\shimx64.efi)
    

    efibootmgr(UEFIブートマネージャー)について、上記のコマンドの結果の読み方などはこのあたりを読んでください。
    efibootmgr その1 – UEFIブートマネージャーを操作するコマンドの紹介・UEFIブートマネージャーに登録されているエントリーの一覧を表示する
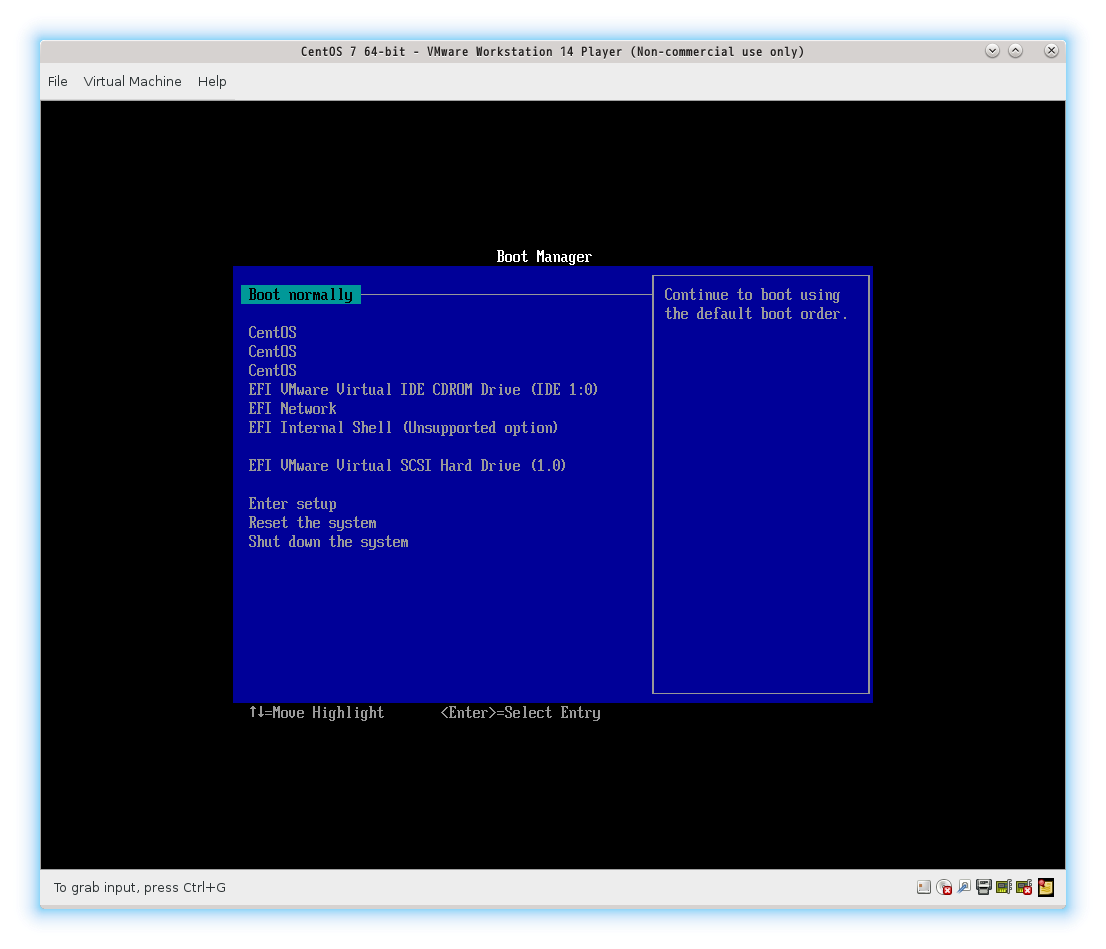
    https://wiki.gentoo.org/wiki/Efibootmgr/ja

    上記のサイトを読むと、交換したHDDのブートローダーを読み込むためにはUEFIブートマネージャーへの設定が必要だと分かります。ちなみに登録していないHDDで起動しようとするとこのように起動出来無くなってしまいます。(うまくやればBootManagerから起動させることは可能です)

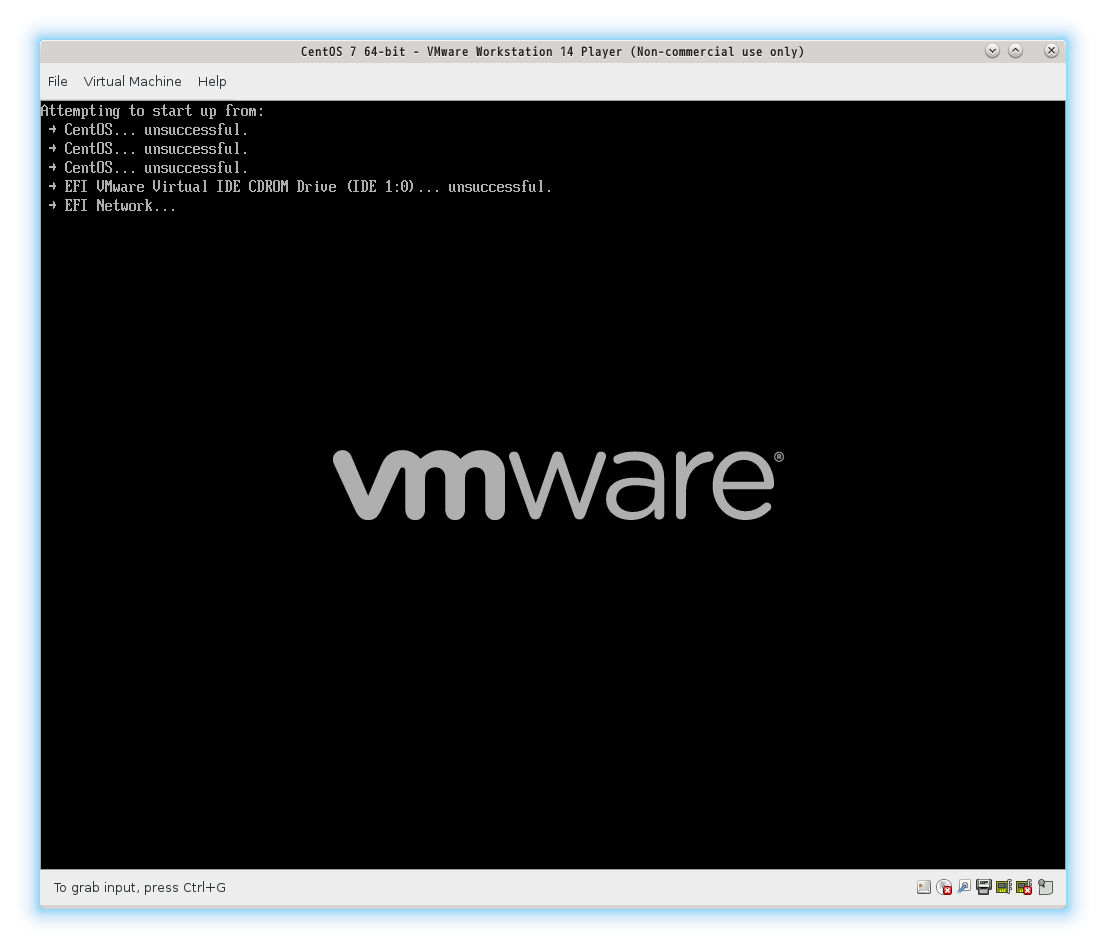
    こうならずに正常に起動するためには次のコマンドを実行する。
    # efibootmgr --create -disk /dev/sda --part 3 --loader '\EFI\centos\shimx64.efi'
    上記のコマンドの中で「/dev/sda」、「3」、「\EFI\centos\shimx64.efi」の箇所はそれぞれの環境によって異る場合があるので気をつけてください。このように設定すると正常に起動することができるようになります。
    上記のコマンド実行後に「efibootmgr -v」を実行して起動順序を確認すると次のように一つ(例ではBoot0007の列)追加されていることが確認できます。

    # efibootmgr -v
    BootCurrent: 0006
    BootOrder: 0007,0006,0005,0002,0003,0004,0001
    Boot0001* 耀෶   PciRoot(0x0)/Pci(0x10,0x0)/SCSI(0,0)/HD(3,GPT,9d1fb208-a4e6-4e43-bda0-182660a0621b,0x259b800,0x64000)/File(\EFI\centos\shimx64.efi)
    Boot0002* EFI VMware Virtual IDE CDROM Drive (IDE 1:0)  PciRoot(0x0)/Pci(0x7,0x1)/Ata(1,0,0)
    Boot0003* EFI Network   PciRoot(0x0)/Pci(0x11,0x0)/Pci(0x1,0x0)/MAC(000c2985f175,0)
    Boot0004* EFI Internal Shell (Unsupported option)       MemoryMapped(11,0xcb3a000,0xcfa0fff)/FvFile(c57ad6b7-0515-40a8-9d21-551652854e37)
    Boot0005* CentOS        HD(3,GPT,765b2167-fa3c-45b1-94d2-e0f3c0adc4d8,0x259b800,0x64000)/File(\EFI\centos\shimx64.efi)
    Boot0006* CentOS        HD(3,GPT,c1304ebe-93b7-4cba-9ee0-a35306fb67b2,0x259b800,0x64000)/File(\EFI\centos\shimx64.efi)
    Boot0007* CentOS        HD(3,GPT,9d1fb208-a4e6-4e43-bda0-182660a0621b,0x259b800,0x64000)/File(\EFI\centos\shimx64.efi)
    

以上!

CentOS7(Ver:7.5)にTensorFlow(Ver:1.8.0)導入

機械学習を試してみようと思いTensorFlowを導入しようとしたが少しハマったため、記録しておく
バージョン
CentOS:7.5
TensorFlow:1.8.0
CUDA: 9.1
cuDNN:7.1.3

最初次のサイトを参考にして導入しようとしたが、CUDAのバージョンが9.0じゃないと動作しないため、ソースからインストールを行った。

CentOS7にTensorFlowをインストールする方法

ソースからインストールするのに参考にしたのは下記のサイトです。

Installing TensorFlow from Sources

実際に導入した際の手順

  1. Gitからtensorflowを得る
    $ git clone https://github.com/tensorflow/tensorflow
  2. Bazelをインストールする
    通常のリポジトリからではBazelは導入できないため、リポジトリを追加してインストールを行う

    $ wget https://copr.fedorainfracloud.org/coprs/vbatts/bazel/repo/epel-7/vbatts-bazel-epel-7.repo
    $ sudo mv vbatts-bazel-epel-7.repo /etc/yum.repos.d/
    $ sudo yum install bazel
  3. 手順1でダウンロードしたディレクトリに移動し、設定する
    $ cd tensorflow
    $ ./configure
    WARNING: Running Bazel server needs to be killed, because the startup options are different.
    You have bazel 0.13.0- (@non-git) installed.
    Please specify the location of python. [Default is /home/{User}/.pyenv/versions/anaconda3-5.1.0/envs/tensorflow/bin/python]: 
    
    
    Found possible Python library paths:
      /home/yuya/.pyenv/versions/anaconda3-5.1.0/envs/tensorflow/lib/python3.6/site-packages
    Please input the desired Python library path to use.  Default is [/home/{User}/.pyenv/versions/anaconda3-5.1.0/envs/tensorflow/lib/python3.6/site-packages]
    
    Do you wish to build TensorFlow with jemalloc as malloc support? [Y/n]: 
    jemalloc as malloc support will be enabled for TensorFlow.
    
    Do you wish to build TensorFlow with Google Cloud Platform support? [Y/n]: n
    No Google Cloud Platform support will be enabled for TensorFlow.
    
    Do you wish to build TensorFlow with Hadoop File System support? [Y/n]: n
    No Hadoop File System support will be enabled for TensorFlow.
    
    Do you wish to build TensorFlow with Amazon S3 File System support? [Y/n]: n
    No Amazon S3 File System support will be enabled for TensorFlow.
    
    Do you wish to build TensorFlow with Apache Kafka Platform support? [Y/n]: n
    No Apache Kafka Platform support will be enabled for TensorFlow.
    
    Do you wish to build TensorFlow with XLA JIT support? [y/N]: 
    No XLA JIT support will be enabled for TensorFlow.
    
    Do you wish to build TensorFlow with GDR support? [y/N]: 
    No GDR support will be enabled for TensorFlow.
    
    Do you wish to build TensorFlow with VERBS support? [y/N]: 
    No VERBS support will be enabled for TensorFlow.
    
    Do you wish to build TensorFlow with OpenCL SYCL support? [y/N]: 
    No OpenCL SYCL support will be enabled for TensorFlow.
    
    Do you wish to build TensorFlow with CUDA support? [y/N]: y
    CUDA support will be enabled for TensorFlow.
    
    Please specify the CUDA SDK version you want to use. [Leave empty to default to CUDA 9.0]: 9.1
    
    
    Please specify the location where CUDA 9.1 toolkit is installed. Refer to README.md for more details. [Default is /usr/local/cuda]: 
    
    
    Please specify the cuDNN version you want to use. [Leave empty to default to cuDNN 7.0]: 7.1.3
    
    
    Please specify the location where cuDNN 7 library is installed. Refer to README.md for more details. [Default is /usr/local/cuda]:
    
    
    Do you wish to build TensorFlow with TensorRT support? [y/N]: 
    No TensorRT support will be enabled for TensorFlow.
    
    Please specify the NCCL version you want to use. [Leave empty to default to NCCL 1.3]: 
    
    
    Please specify a list of comma-separated Cuda compute capabilities you want to build with.
    You can find the compute capability of your device at: https://developer.nvidia.com/cuda-gpus.
    Please note that each additional compute capability significantly increases your build time and binary size. [Default is: 6.1]
    
    
    Do you want to use clang as CUDA compiler? [y/N]: 
    nvcc will be used as CUDA compiler.
    
    Please specify which gcc should be used by nvcc as the host compiler. [Default is /usr/bin/gcc]: 
    
    
    Do you wish to build TensorFlow with MPI support? [y/N]: 
    No MPI support will be enabled for TensorFlow.
    
    Please specify optimization flags to use during compilation when bazel option "--config=opt" is specified [Default is -march=native]: 
    
    
    Would you like to interactively configure ./WORKSPACE for Android builds? [y/N]: 
    Not configuring the WORKSPACE for Android builds.
    
    Preconfigured Bazel build configs. You can use any of the below by adding "--config=<>" to your build command. See tools/bazel.rc for more details.
            --config=mkl            # Build with MKL support.
            --config=monolithic     # Config for mostly static monolithic build.
    Configuration finished
  4. ビルド実施
    次のようにリンクを貼らないとエラーが起こるので次のコマンドを実行する
    $ sudo ln -s /usr/local/cuda/include/crt/math_functions.hpp /usr/local/cuda/include/math_functions.hpp
    ビルド開始

    $ bazel build --config=mkl --config=monolithic --config=cuda //tensorflow/tools/pip_package:build_pip_package
    
    (...省略... )
    
    ./tensorflow/core/kernels/cwise_ops.h(199): warning: __device__ annotation on a defaulted function("scalar_right") is ignored
    
    Target //tensorflow/tools/pip_package:build_pip_package up-to-date:
    bazel-bin/tensorflow/tools/pip_package/build_pip_package
    INFO: Elapsed time: 2151.254s, Critical Path: 168.00s
    INFO: 5277 processes, local.
    INFO: Build completed successfully, 5387 total actions
  5. パッケージの作成
    $ bazel-bin/tensorflow/tools/pip_package/build_pip_package /tmp/tensorflow_pkg
  6. パッケージからインストール
    $ pip install /tmp/tensorflow_pkg/tensorflow-1.8.0-cp36-cp36m-linux_x86_64.whl
  7. 正常にインストールできたか確認
    $ python
    Python 3.6.4 |Anaconda, Inc.| (default, Mar 13 2018, 01:15:57) 
    [GCC 7.2.0] on linux
    Type "help", "copyright", "credits" or "license" for more information.
    >>> import tensorflow as tf
    >>> hello = tf.constant('Hello, TensorFlow!')
    2018-05-12 21:22:39.196485: E tensorflow/core/framework/op_kernel.cc:1242] OpKernel ('op: "_MklConv2DWithBiasBackpropBias" device_type: "CPU" constraint { name: "T" allowed_values { list { type: DT_FLOAT } } } label: "MklOp"') for unknown op: _MklConv2DWithBiasBackpropBias
    >>> sess = tf.Session()
    2018-05-12 21:22:39.199427: I tensorflow/core/platform/cpu_feature_guard.cc:141] Your CPU supports instructions that this TensorFlow binary was not compiled to use: SSE4.1 SSE4.2 AVX AVX2 FMA
    2018-05-12 21:22:39.371104: I tensorflow/core/common_runtime/gpu/gpu_device.cc:1349] Found device 0 with properties: 
    name: GeForce GTX 1080 major: 6 minor: 1 memoryClockRate(GHz): 1.911
    pciBusID: 0000:02:00.0
    totalMemory: 7.92GiB freeMemory: 6.96GiB
    2018-05-12 21:22:39.371163: I tensorflow/core/common_runtime/gpu/gpu_device.cc:1428] Adding visible gpu devices: 0
    2018-05-12 21:22:39.614577: I tensorflow/core/common_runtime/gpu/gpu_device.cc:916] Device interconnect StreamExecutor with strength 1 edge matrix:
    2018-05-12 21:22:39.614618: I tensorflow/core/common_runtime/gpu/gpu_device.cc:922]      0 
    2018-05-12 21:22:39.614628: I tensorflow/core/common_runtime/gpu/gpu_device.cc:935] 0:   N 
    2018-05-12 21:22:39.614806: I tensorflow/core/common_runtime/gpu/gpu_device.cc:1046] Created TensorFlow device (/job:localhost/replica:0/task:0/device:GPU:0 with 6721 MB memory) -> physical GPU (device: 0, name: GeForce GTX 1080, pci bus id: 0000:02:00.0, compute capability: 6.1)
    2018-05-12 21:22:39.690978: I tensorflow/core/common_runtime/process_util.cc:64] Creating new thread pool with default inter op setting: 2. Tune using inter_op_parallelism_threads for best performance.
    >>> print(sess.run(hello))
    b'Hello, TensorFlow!'

以上!