smartctl の内容について

smartctlコマンドは、ハードディスクのS.M.A.R.T.(Self-Monitoring, Analysis and Reporting Technology System)情報を確認するものである。いつもこのコマンドを使うたびに出力内容について検索していたので、ここにまとめておく。

  1. 基本的な使用方法
    # smartctl [オプション] デバイス名
    オプションには様々あるが、今回は”-a”のみ。
  2. コマンドの実行結果
    # smartctl -a /dev/sda
    smartctl 6.2 2013-07-26 r3841 [x86_64-linux-3.10.0-229.20.1.el7.x86_64] (local build)
    Copyright (C) 2002-13, Bruce Allen, Christian Franke, www.smartmontools.org
    
    === START OF INFORMATION SECTION ===
    Model Family:     Western Digital Caviar Green (AF, SATA 6Gb/s)
    Device Model:     WDC WD20EZRX-00D8PB0
    Serial Number:    WD-WMC4N0F2RNSM
    LU WWN Device Id: 5 0014ee 0593e2f83
    Firmware Version: 80.00A80
    User Capacity:    2,000,398,934,016 bytes [2.00 TB]
    Sector Sizes:     512 bytes logical, 4096 bytes physical
    Rotation Rate:    5400 rpm
    Device is:        In smartctl database [for details use: -P show]
    ATA Version is:   ACS-2 (minor revision not indicated)
    SATA Version is:  SATA 3.0, 6.0 Gb/s (current: 3.0 Gb/s)
    Local Time is:    Tue May 31 13:46:51 2016 JST
    SMART support is: Available - device has SMART capability.
    SMART support is: Enabled
    
    === START OF READ SMART DATA SECTION ===
    SMART overall-health self-assessment test result: PASSED
    
    General SMART Values:
    Offline data collection status:  (0x84)	Offline data collection activity
    					was suspended by an interrupting command from host.
    					Auto Offline Data Collection: Enabled.
    Self-test execution status:      (   0)	The previous self-test routine completed
    					without error or no self-test has ever 
    					been run.
    Total time to complete Offline 
    data collection: 		(27420) seconds.
    Offline data collection
    capabilities: 			 (0x7b) SMART execute Offline immediate.
    					Auto Offline data collection on/off support.
    					Suspend Offline collection upon new
    					command.
    					Offline surface scan supported.
    					Self-test supported.
    					Conveyance Self-test supported.
    					Selective Self-test supported.
    SMART capabilities:            (0x0003)	Saves SMART data before entering
    					power-saving mode.
    					Supports SMART auto save timer.
    Error logging capability:        (0x01)	Error logging supported.
    					General Purpose Logging supported.
    Short self-test routine 
    recommended polling time: 	 (   2) minutes.
    Extended self-test routine
    recommended polling time: 	 ( 277) minutes.
    Conveyance self-test routine
    recommended polling time: 	 (   5) minutes.
    SCT capabilities: 	       (0x7035)	SCT Status supported.
    					SCT Feature Control supported.
    					SCT Data Table supported.
    
    SMART Attributes Data Structure revision number: 16
    Vendor Specific SMART Attributes with Thresholds:
    ID# ATTRIBUTE_NAME          FLAG     VALUE WORST THRESH TYPE      UPDATED  WHEN_FAILED RAW_VALUE
      1 Raw_Read_Error_Rate     0x002f   200   200   051    Pre-fail  Always       -       1
      3 Spin_Up_Time            0x0027   189   170   021    Pre-fail  Always       -       5533
      4 Start_Stop_Count        0x0032   100   100   000    Old_age   Always       -       45
      5 Reallocated_Sector_Ct   0x0033   200   200   140    Pre-fail  Always       -       0
      7 Seek_Error_Rate         0x002e   200   200   000    Old_age   Always       -       0
      9 Power_On_Hours          0x0032   081   081   000    Old_age   Always       -       14072
     10 Spin_Retry_Count        0x0032   100   253   000    Old_age   Always       -       0
     11 Calibration_Retry_Count 0x0032   100   253   000    Old_age   Always       -       0
     12 Power_Cycle_Count       0x0032   100   100   000    Old_age   Always       -       45
    192 Power-Off_Retract_Count 0x0032   200   200   000    Old_age   Always       -       9
    193 Load_Cycle_Count        0x0032   069   069   000    Old_age   Always       -       395783
    194 Temperature_Celsius     0x0022   115   108   000    Old_age   Always       -       35
    196 Reallocated_Event_Count 0x0032   200   200   000    Old_age   Always       -       0
    197 Current_Pending_Sector  0x0032   200   200   000    Old_age   Always       -       0
    198 Offline_Uncorrectable   0x0030   200   200   000    Old_age   Offline      -       0
    199 UDMA_CRC_Error_Count    0x0032   200   200   000    Old_age   Always       -       0
    200 Multi_Zone_Error_Rate   0x0008   200   200   000    Old_age   Offline      -       0
    
    SMART Error Log Version: 1
    No Errors Logged
    
    SMART Self-test log structure revision number 1
    No self-tests have been logged.  [To run self-tests, use: smartctl -t]
    
    SMART Selective self-test log data structure revision number 1
     SPAN  MIN_LBA  MAX_LBA  CURRENT_TEST_STATUS
        1        0        0  Not_testing
        2        0        0  Not_testing
        3        0        0  Not_testing
        4        0        0  Not_testing
        5        0        0  Not_testing
    Selective self-test flags (0x0):
      After scanning selected spans, do NOT read-scan remainder of disk.
    If Selective self-test is pending on power-up, resume after 0 minute delay.
    
  3. 出力結果の詳細

      1. HDDの情報(オプション”-i”で単独に出力可能)
        Model Family:     Western Digital Caviar Green (AF, SATA 6Gb/s)
        Device Model:     WDC WD20EZRX-00D8PB0
        Serial Number:    WD-WMC4N0F2RNSM
        LU WWN Device Id: 5 0014ee 0593e2f83
        Firmware Version: 80.00A80
        User Capacity:    2,000,398,934,016 bytes [2.00 TB]
        Sector Sizes:     512 bytes logical, 4096 bytes physical
        Rotation Rate:    5400 rpm
        Device is:        In smartctl database [for details use: -P show]
        ATA Version is:   ACS-2 (minor revision not indicated)
        SATA Version is:  SATA 3.0, 6.0 Gb/s (current: 3.0 Gb/s)
        Local Time is:    Tue May 31 13:46:51 2016 JST
        SMART support is: Available - device has SMART capability.
        SMART support is: Enabled
        
      2. ヘルステストの結果(オプション”-H”で単独に出力可能)
        SMART overall-health self-assessment test result: PASSED
        
      3. デバイスが実装している SMART の機能(オプション”-c”で単独に出力可能)
        General SMART Values:
        Offline data collection status:  (0x84)	Offline data collection activity
        					was suspended by an interrupting command from host.
        					Auto Offline Data Collection: Enabled.
        Self-test execution status:      (   0)	The previous self-test routine completed
        					without error or no self-test has ever 
        					been run.
        Total time to complete Offline 
        data collection: 		(27420) seconds.
        Offline data collection
        capabilities: 			 (0x7b) SMART execute Offline immediate.
        					Auto Offline data collection on/off support.
        					Suspend Offline collection upon new
        					command.
        					Offline surface scan supported.
        					Self-test supported.
        					Conveyance Self-test supported.
        					Selective Self-test supported.
        SMART capabilities:            (0x0003)	Saves SMART data before entering
        					power-saving mode.
        					Supports SMART auto save timer.
        Error logging capability:        (0x01)	Error logging supported.
        					General Purpose Logging supported.
        Short self-test routine 
        recommended polling time: 	 (   2) minutes.
        Extended self-test routine
        recommended polling time: 	 ( 277) minutes.
        Conveyance self-test routine
        recommended polling time: 	 (   5) minutes.
        SCT capabilities: 	       (0x7035)	SCT Status supported.
        					SCT Feature Control supported.
        					SCT Data Table supported.
        
      4. ベンダー固有の属性情報(オプション”-A”で単独に出力可能)
        詳細はWikipedia

        SMART Attributes Data Structure revision number: 16
        Vendor Specific SMART Attributes with Thresholds:
        ID# ATTRIBUTE_NAME          FLAG     VALUE WORST THRESH TYPE      UPDATED  WHEN_FAILED RAW_VALUE
          1 Raw_Read_Error_Rate     0x002f   200   200   051    Pre-fail  Always       -       1
          3 Spin_Up_Time            0x0027   189   170   021    Pre-fail  Always       -       5533
          4 Start_Stop_Count        0x0032   100   100   000    Old_age   Always       -       45
          5 Reallocated_Sector_Ct   0x0033   200   200   140    Pre-fail  Always       -       0
          7 Seek_Error_Rate         0x002e   200   200   000    Old_age   Always       -       0
          9 Power_On_Hours          0x0032   081   081   000    Old_age   Always       -       14072
         10 Spin_Retry_Count        0x0032   100   253   000    Old_age   Always       -       0
         11 Calibration_Retry_Count 0x0032   100   253   000    Old_age   Always       -       0
         12 Power_Cycle_Count       0x0032   100   100   000    Old_age   Always       -       45
        192 Power-Off_Retract_Count 0x0032   200   200   000    Old_age   Always       -       9
        193 Load_Cycle_Count        0x0032   069   069   000    Old_age   Always       -       395783
        194 Temperature_Celsius     0x0022   115   108   000    Old_age   Always       -       35
        196 Reallocated_Event_Count 0x0032   200   200   000    Old_age   Always       -       0
        197 Current_Pending_Sector  0x0032   200   200   000    Old_age   Always       -       0
        198 Offline_Uncorrectable   0x0030   200   200   000    Old_age   Offline      -       0
        199 UDMA_CRC_Error_Count    0x0032   200   200   000    Old_age   Always       -       0
        200 Multi_Zone_Error_Rate   0x0008   200   200   000    Old_age   Offline      -       0
        
      5. エラーログ(オプション”-l error”で単独に出力可能)
        SMART Error Log Version: 1
        No Errors Logged
        
      6. セルフテストの結果(オプション”-l selftest”で単独に出力可能)
        SMART Self-test log structure revision number 1
        No self-tests have been logged. [To run self-tests, use: smartctl -t]


    1. セレクティブセルフテストの結果(オプション”-l selective”で単独に出力可能)
      SMART Selective self-test log data structure revision number 1 SPAN MIN_LBA MAX_LBA CURRENT_TEST_STATUS 1 0 0 Not_testing 2 0 0 Not_testing 3 0 0 Not_testing 4 0 0 Not_testing 5 0 0 Not_testing Selective self-test flags (0x0): After scanning selected spans, do NOT read-scan remainder of disk. If Selective self-test is pending on power-up, resume after 0 minute delay.

ナンプレを解くプログラム1(全探索)

ナンプレを解くプログラムを方法ごとに3つ作成した。今回はその中で全探索による解法を紹介する。
全探索という名前の通り,すべての組み合わせを試し,ナンプレのルールに矛盾しないものを見つけ出す方法である。アルゴリズムは次のようになる。

—– アルゴリズム —–

  1. 数値が確定していないマスに,矛盾しない数値を入れる。2.へ
  2. 次の空いているマスについても同様に,矛盾しない数値を入れる。3.へ
  3. 矛盾しない数値が存在する場合は2.へ,存在しない場合は4.へ
  4. 一つ前のマスに戻り,別の矛盾しない数値を入れる。3.へ

このアルゴリズムをC言語で実装した
ソースファイル             →nan_solve_全探索.c
サンプルの問題データ → sample.txt

——— 2018/05/13 追記 ———-
ソースファイルとサンプルの問題データをGitLabに移動した。
https://gitlab.alprovs.com/alprovs/numberPlace-fullSearch

このコードをコンパイルして実行した結果を一応載せておきます

$ ./a.out ./sample.txt 
  /  2  /   /  /  /   /  7  / 
  9  /  /   1  /  2   /  /  8 
  /  /  /   /  8  /   /  /  / 

  /  5  /   /  /  /   /  1  / 
  /  /  7   /  9  /   5  /  / 
  /  6  /   /  /  /   /  2  / 

  /  /  /   /  4  /   /  /  / 
  5  /  /   8  /  3   /  /  9 
  /  1  /   /  /  /   /  6  / 


  8  2  1   4  5  9   6  7  3 
  9  3  6   1  7  2   4  5  8 
  7  4  5   3  8  6   2  9  1 

  2  5  4   6  3  8   9  1  7 
  1  8  7   2  9  4   5  3  6 
  3  6  9   7  1  5   8  2  4 

  6  9  3   5  4  1   7  8  2 
  5  7  2   8  6  3   1  4  9 
  4  1  8   9  2  7   3  6  5

以上。

この方法はプログラムで実装するには簡単なのですが,解けるまでの時間はかなり遅いです。
通常の9×9であれば遅くても数秒あれば解くことができますが,16×16となると数日かかります。
ということで,次回はもっと早く解くことのできるアルゴリズムを紹介しようと思います。

ESATAドライブのホットスワップ(Linux)

ESATA接続のHDDをホットスワップする必要があった為,方法を簡単にまとめておく。

  • 接続方法(ホットプラグ)
    ESATAをHDDに接続してdmesgコマンドで確かめてもOS側で認識されない。認識させるためには
    # echo 0 - 0 > /sys/class/scsi_host/host0/scan
    を実行する(host0の部分は目的のデバイスに応じて変更する)と,

    # dmesg
    :
    :
    [540147.524174] ata1: soft resetting link
    [540147.678925] ata1.00: ATA-9: WDC WD40EFRX-68WT0N0, 82.00A82, max UDMA/133
    [540147.678934] ata1.00: 7814037168 sectors, multi 0: LBA48 NCQ (depth 0/32)
    [540147.678942] ata1.00: limited to UDMA/33 due to 40-wire cable
    [540147.682757] ata1.00: configured for UDMA/33
    [540147.682773] ata1: EH complete
    [540147.683078] scsi 0:0:0:0: Direct-Access     ATA      WDC WD40EFRX-68W 82.0 PQ: 0 ANSI: 5
    [540147.684285] sd 0:0:0:0: Attached scsi generic sg4 type 0
    [540147.684508] sd 0:0:0:0: [sde] 7814037168 512-byte logical blocks: (4.00 TB/3.63 TiB)
    [540147.684512] sd 0:0:0:0: [sde] 4096-byte physical blocks
    [540147.684575] sd 0:0:0:0: [sde] Write Protect is off
    [540147.684579] sd 0:0:0:0: [sde] Mode Sense: 00 3a 00 00
    [540147.684607] sd 0:0:0:0: [sde] Write cache: enabled, read cache: enabled, doesn't support DPO or FUA
    [540156.506578]  sde: sde1 sde2
    [540156.507496] sd 0:0:0:0: [sde] Attached SCSI disk
    

    このように認識される。

  • 取り外し方法(ホットリムーブ)
    取り外す前に必ずアンマウントすること,忘れると亡霊が残り続けるので注意。
    次のコマンドを実行するとHDDの電源が切れる(sdeの部分は目的のデバイスに応じて変更する)。
    # echo 1 > /sys/block/sde/device/delete

    # dmesg
    :
    :
    [540381.624246] sd 0:0:0:0: [sde] Synchronizing SCSI cache
    [540381.624432] sd 0:0:0:0: [sde] Stopping disk
    [540382.035410] ata1.00: disabled

この方法によりESATAデバイスについてはホットスワップできることが実際に確かめられた。
他にもSATAデバイスについてもできると思う。

参考ページ
http://blog.jojo.jp/?eid=1173131
http://piro791.blog.so-net.ne.jp/2010-08-20

C言語でのnan inf

プログラムでオーバーフローするような大きな値を扱った際にnan(非数)やinf(無限)が出現した。このnanやinfが出現する法則がよくわからないので(マニュアル等を見れば書いてあるのだろうが…)自分が所持している環境で検証を行った。ソースは次のとおり

#include 
#include 

int main(void)
{
  printf("1/0  = %f\n", 1./0.);
  printf("exp(710) = %e\n", exp(710.));
  printf("log(0) = %f\n\n", log(0.));
  //infの有限値との加減乗除
  printf("1 + inf = %f\n", 1.+exp(710.));
  printf("1 - inf = %f\n", 1.-exp(710.));
  printf("1 * inf = %f\n", 1.*exp(710.));
  printf("1 / inf = %f\n\n", 1./exp(710.));
  //inf同士の加減乗除
  printf("inf + inf = %f\n", exp(710.)+exp(710.));
  printf("inf - inf = %f\n", exp(710.)-exp(710.));
  printf("inf * inf = %f\n", exp(710.)*exp(710.));
  printf("inf / inf = %f\n\n", exp(710.)/exp(710.));
  //nanと有限値の加減乗除
  printf("1 + nan = %f\n", 1.+(exp(710.)/exp(710.)));
  printf("1 - nan = %f\n", 1.-(exp(710.)/exp(710.)));
  printf("1 * nan = %f\n", 1.*(exp(710.)/exp(710.)));
  printf("1 / nan = %f\n\n", 1./(exp(710.)/exp(710.)));
  return 0;
}

最初の3つの式がパッと思いついたnan,infになると思われるもので、
1/0 = nan, exp(710) = inf, log(0) = -infになると予想する。
指数関数の710という値はdouble型の上限1.797693e+308から
exp(x) = 1.797693e+308 -> x = log(1.797693)+308*log(10) = 709.78
より上限を越える値を選択した。

  • 結果1
    コンパイラ:gcc(version 4.4.7)
    実行結果

    1/0  = inf
    exp(710) = inf
    log(0) = -inf
    
    1 + inf = inf
    1 - inf = -inf
    1 * inf = inf
    1 / inf = 0.000000
    
    inf + inf = inf
    inf - inf = -nan
    inf * inf = inf
    inf / inf = -nan
    
    1 + nan = -nan
    1 - nan = -nan
    1 * nan = -nan
    1 / nan = -nan
  • 結果2
    コンパイラ:Microsoft(R) 32-bit C/C++ Optimizing Compiler Version 15.00.21022.08(Visual Studio 2008)
    このコンパイラでは1/0は
    「error C2124: 除算、剰余演算が 0 で行われています。」
    とエラーで弾かれてしまった為、変数に0を格納して実行した。
    実行結果

    1/0  = 1.#INF00
    exp(710) = 1.#INF00
    log(0) = -1.#INF00
    
    1 + inf = 1.#INF00
    1 - inf = -1.#INF00
    1 * inf = 1.#INF00
    1 / inf = 0.000000
    
    inf + inf = 1.#INF00
    inf - inf = -1.#IND00
    inf * inf = 1.#INF00
    inf / inf = -1.#IND00
    
    1 + nan = -1.#IND00
    1 - nan = -1.#IND00
    1 * nan = -1.#IND00
    1 / nan = -1.#IND00

    結果の表現は違うが1.#INF00はinf、-1.#IND00はnanを表している

今回2つの環境でテストを行ったが、両方共に同じ結果となった。ちなみに変数がinfかnanかを判定するには”==”でなく”isinf()”と”isnan()”というマクロを使用する。(詳細は他のサイトを参考にしてください)

Virtual Box 5.0.X での Kernel module rebuild (CentOS7))

今まで(バージョン4.X.X以前のVirtual Box)ではカーネルアップデートの度に
/etc/init.d/vboxdrv setup
というコマンドを入力してVirtual BoxのKernel moduleをリビルドしていた。Virtual Box 5.0.X では,次のように
/usr/lib/virtualbox/vboxdrv.sh setup
とコマンドを入力するとリビルドできる。

ちなみにエラー表示で入力するコマンドを教えてくれるのだが,うまく動作しなかったためこのメモを残しておく。

参考ページ:http://www.if-not-true-then-false.com/2010/install-virtualbox-with-y

Virtual BoxをGUIのない環境で使用する

GUIのないシステムでVirtual Boxを使用する必要があったので仮想マシンの作成〜実行までの手順をまとめておく。使用したVirtual Box のバージョンは5.0.6である。

  1. 仮想マシンの作成
    $ VBoxManage createvm --name <VM name> --ostype <type> --register
    <VM name>には作成する仮想マシンの任意の名前を指定する。以降で出てくる<VM name>にはここでの名前を使用する。
    <type>には次のコマンド
    $ VBoxManage list ostypes
    で表示されるリストの中で最適なものを指定する(--ostype の指定は無くても良い)
  2. 仮想ディスクの作成
    $ VBoxManage createhd disk --filename <VHD name> --size <M Byte> --variant Fixed
    <VHD name>には仮想ディスクの任意の名前を指定する。以降で出てくる<VHD name>にはここでの名前を使用する。
    <M Byte>には仮想ディスクのサイズをメガバイト単位で指定する。
    ・最後の--variant Fixedというのは固定サイズで仮想ディスクを作成するという意味であり,他にも「可変サイズで作成」などの値を指定することができる。
  3. SATAコントローラを追加する
    $ VBoxManage storagectl <VM name> --name "SATA Controller" --add sata --controller IntelAHCI
  4. 2.で作成した仮想ディスクをSATAに接続
    $ VBoxManage storageattach <VM name> –storagectl “SATA Controller” –port 0 –device 0 –type hdd –medium <VHD name>
  5. IDEコントローラを追加する
    $ VBoxManage storagectl <VM name> --name "IDE Controller" --add ide
  6. OSのイメージディスクをIDEに接続
    $ VBoxManage storageattach <VM name> --storagectl "IDE Controller" --port 0 --device 0 --type dvddrive --medium <media path>
    <media path>にはイメージディスクのパスを指定する。
  7. 仮想マシンの設定
    $ VBoxManage modifyvm <VM name> --memory <M Byte> --pae on --nic1 bridged --bridgeadapter1 <Interface Name>
    ・上記のコマンドではメモリのサイズの設定とネットワークインターフェースの設定を行なっているが,他にも多くの設定項目があるので適宜設定してください。
  8. 仮想マシンの起動
    $ VBoxHeadless --startvm <VM name> -v on
    ・最後の-v onというコマンドはRDPでのリモート接続の機能を有効にするという意味である。また,この機能を有効にするためにはExtension Packをインストールする必要があり,Virtual BoxのサイトからExtension Packをダウンロードして
    # VBoxManage extpack install <ダウンロードしたファイル名>
    とすることでインストールすることができる。
  9. 操作
    ホストコンピュータのIPアドレスにRDPでリモート接続することで実行した仮想マシンにアクセスすることができる。

とりあえず作成から実行までの手順をまとめたが,他にも色々と面白そうな機能があるので時間があれば紹介しようと思う。
参考までに,今回のコマンドの詳細はこちら

VMware Player の Workstation のバージョンを変更

VMware PlayerをアップグレードするとWorkstationのバージョンは古いバージョンのままになります。次の画像はVMware Workstation 12 Playerのものです。
14

Workstationのバージョンの変更は簡単で,対象の***.vmxを次のように書き換えます(変更するバージョンは適宜選択してください)

virtualHW.version = "10"
   ↓
virtualHW.version = "12"

VMware Playerを再起動すると
15
このようにアップグレードすることができます。

owncloud (Ver. 8.1.1) texteditor Shift-JIS の文字化け対処

以前にもtexteditorのShift-JISの文字化けの対処法を書いているが,バージョンの変更に伴い構成も変わっていたのでVer. 8.1.1での文字化けの対処法を記録しておく。

変更内容は以前の対処法と変わりないが,書き換えるファイルが
OC/apps/files_texteditor/controller/filehandlingcontroller.php
となった。このファイルに次のように”SJIS-win”を追加する

$encoding = mb_detect_encoding($filecontents . "a", "UTF-8, WINDOWS-1252, ISO-8859-15, ISO-8859-1, ASCII", true);
  ↓
$encoding = mb_detect_encoding($filecontents . "a", "SJIS-win, UTF-8, WINDOWS-1252, ISO-8859-15, ISO-8859-1, ASCII", true);

Owncloud update Ver8.0.x → Ver8.1.x

運用しているOwncloudのアップデートを行った。

普段のアップデート同様に管理画面のアップデートの項目でクリックしていくだけでアップデートは完了する。
しかし,今まで使用していたアプリを有効にするとページが応答しなくなるという問題が発生した。しかたないので対象のアプリをサーバ側で削除した。Owncloud のアプリのページを見ているとアプリのダウンロードがVer8.0.xとVer8.1.xで分かれておりアプリについても更新しないといけないみたいで,更新した結果正常に動作するよになった。

今回のバージョンアップでは,サイトの応答速度がかなり早くなったように感じる。またアプリの一覧が表示されるまでの時間が大幅に早くなった。

[BIOS]mdadmによるRAID1 – 復旧方法 –

——————– 2018/05/26 追記 ——————–

ここでは BIOS により起動するシステムの手順を記載している。UEFI により起動するシステムの手順は 「[UEFI]mdadmによるRAID1 – 復旧方法 –」に記載している。

——————– ここまで            ——————–


software RAID である mdadm を使用してインストール時に RAID1 構築し,故障を発生させてディスクを取り替えるテストを行った。
その際の手順を説明する。

このテストは仮想環境(VirtualBox)上で,CentOS7を使用して行った。

    • 仮想マシンの設定
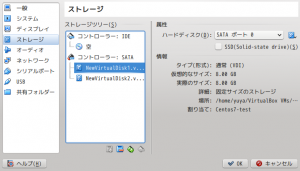
      テスト用に新しい仮想マシンを作成する際に,仮想ハードドライブは8GB(固定サイズ)で作成した。さらに,RAIDを構築するために同じ 8GB(固定サイズ)で仮想ハードドライブを2つ作成した。(一方はインストール時に構築するため,他方は故障させたドライブと交換するため)
      9
      このようにドライブを接続しておく。CentOS7でRAID構成のインストールは調べれば出てくると思うので,インストール手順の詳細は省く。
    • パーティション構成
      パーティションはインストール時に

      /boot: 524 MB
      /    : 6291 MB
      swap : 1767 MB

      という構成で作成した。以下に示したのはコマンドfdisk -lの結果である。

      # fdisk -l
      Disk /dev/sdb: 8589 MB, 8589934592 bytes, 16777216 sectors
      Units = sectors of 1 * 512 = 512 bytes
      Sector size (logical/physical): 512 bytes / 512 bytes
      I/O サイズ (最小 / 推奨): 512 バイト / 512 バイト
      Disk label type: dos
      ディスク識別子: 0x0009a438
      
      デバイス ブート 始点 終点 ブロック Id システム
      /dev/sdb1 2048 12298239 6148096 fd Linux raid autodetect
      /dev/sdb2 * 12298240 13322239 512000 fd Linux raid autodetect
      /dev/sdb3 13322240 16777215 1727488 fd Linux raid autodetect
      
      Disk /dev/sda: 8589 MB, 8589934592 bytes, 16777216 sectors
      Units = sectors of 1 * 512 = 512 bytes
      Sector size (logical/physical): 512 bytes / 512 bytes
      I/O サイズ (最小 / 推奨): 512 バイト / 512 バイト
      Disk label type: dos
      ディスク識別子: 0x00017b65
      
      デバイス ブート 始点 終点 ブロック Id システム
      /dev/sda1 2048 12298239 6148096 fd Linux raid autodetect
      /dev/sda2 * 12298240 13322239 512000 fd Linux raid autodetect
      /dev/sda3 13322240 16777215 1727488 fd Linux raid autodetect
      
      Disk /dev/md127: 6291 MB, 6291390464 bytes, 12287872 sectors
      Units = sectors of 1 * 512 = 512 bytes
      Sector size (logical/physical): 512 bytes / 512 bytes
      I/O サイズ (最小 / 推奨): 512 バイト / 512 バイト
      
      Disk /dev/md126: 524 MB, 524222464 bytes, 1023872 sectors
      Units = sectors of 1 * 512 = 512 bytes
      Sector size (logical/physical): 512 bytes / 512 bytes
      I/O サイズ (最小 / 推奨): 512 バイト / 512 バイト
      
      Disk /dev/md125: 1767 MB, 1767833600 bytes, 3452800 sectors
      Units = sectors of 1 * 512 = 512 bytes
      Sector size (logical/physical): 512 bytes / 512 bytes
      I/O サイズ (最小 / 推奨): 512 バイト / 512 バイト

      この結果の最後に出てくる/dev/md125, /dev/md126, /dev/md127というのはmdadmによって作成されたRAIDデバイスことである。

    • RAIDの状態確認
      RAIDデバイスの状態は cat /proc/mdstat というコマンドで確認できる。

      # cat /proc/mdstat
      Personalities : [raid1]
      md125 : active raid1 sdb3[1] sda3[0]
            1726400 blocks super 1.2 [2/2] [UU]
      md126 : active raid1 sda2[0] sdb2[1]
            511936 blocks super 1.0 [2/2] [UU]
      md127 : active raid1 sdb1[1] sda1[0]
            6143936 blocks super 1.2 [2/2] [UU]
            bitmap: 0/1 pages [0KB], 65536KB chunk
      unused devices: <none>

      この出力の簡単な読み方は,RAIDデバイス/dev/md125を例とすると次のようになる。
      一番左に書かれている”md125”はRAIDデバイス名で,”sdb3[1] sda3[0]”はmd125というRAIDデバイスを構成している物理デバイス名を表している。そして二行目の”[]”の中に書かれているのは物理デバイスの稼働状況を示している。このあとに物理デバイスを故障したと見せかけるのでその時にどうなるかわかるだろう。

    • 物理デバイスを故障させる
      mdadmには物理デバイスを故障したと見せかけるコマンドがある。

      # mdadm --fail [RAIDデバイス名] [故障させる物理デバイス名]
      # mdadm -f [RAIDデバイス名] [故障させる物理デバイス名]

      これを用いて/dev/sdaの物理デバイスを故障させてみる。各RAIDデバイスから/dev/sdaを故障させてcat /proc/mdstatを実行した結果を以下に示す。

      # mdadm -f /dev/md125 /dev/sda
      mdadm: set device faulty failed for /dev/sda:  No such device
      # mdadm -f /dev/md125 /dev/sda3
      mdadm: set /dev/sda3 faulty in /dev/md125
      # mdadm -f /dev/md126 /dev/sda2
      mdadm: set /dev/sda2 faulty in /dev/md126
      # mdadm -f /dev/md127 /dev/sda1
      mdadm: set /dev/sda1 faulty in /dev/md127
      # cat /proc/mdstat
      Personalities : [raid1] 
      md125 : active raid1 sdb3[1] sda3[0](F)
            1726400 blocks super 1.2 [2/1] [_U]
            
      md126 : active raid1 sda2[0](F) sdb2[1]
            511936 blocks super 1.0 [2/1] [_U]
            
      md127 : active raid1 sdb1[1] sda1[0](F)
            6143936 blocks super 1.2 [2/1] [_U]
            bitmap: 1/1 pages [4KB], 65536KB chunk
      
      unused devices: <none>
    • RAIDデバイスから物理デバイスを取り除く(故障後のみ実行可能)
      # mdadm --remove [RAIDデバイス名] [故障させる物理デバイス名]
      # mdadm -r [RAIDデバイス名] [故障させる物理デバイス名]

      このコマンドによってRAIDデバイスから物理デバイスを取り除くことができる。
      以下に実行結果を示す。

      # mdadm -r /dev/md125 /dev/sda3
      mdadm: hot removed /dev/sda3 from /dev/md125
      # mdadm -r /dev/md126 /dev/sda2
      mdadm: hot removed /dev/sda2 from /dev/md126
      # mdadm -r /dev/md127 /dev/sda1
      mdadm: hot removed /dev/sda1 from /dev/md127
      # cat /proc/mdstat
      Personalities : [raid1]
      md125 : active raid1 sdb3[1]
            1726400 blocks super 1.2 [2/1] [_U]
            
      md126 : active raid1 sdb2[1]
            511936 blocks super 1.0 [2/1] [_U]
            
      md127 : active raid1 sdb1[1]
            6143936 blocks super 1.2 [2/1] [_U]
            bitmap: 1/1 pages [4KB], 65536KB chunk
      
      unused devices: <none>

      cat /proc/mdstatの結果からきちんとRAIDデバイスから物理デバイスが取り外されていることがわかる。ここまで長かったが,ようやくハードディスクの取り換えをおこなう。そのためにシャットダウンする。

    • ハードディスクの交換
      (システム領域を含んでいるハードディスクの場合)交換する際にハードディスクの順番を気を付けなければならない。基本的にBIOSは一番若い番号(0番とする)に接続されているハードディスクにboot情報を読み取りに行く。そのため今回のように0番目のハードディスクが故障した場合(Linuxでは基本的に若い番号順にsda, sdb…と割り振られる)1番に接続していたハードディスクを0番に移動し,新しいハードディスクを1番に接続しなければならない。よって次の写真のように接続する。
      11
      今回は仮想環境上で行なっているのでポート番号は簡単にわかるが,実際にハードで行う際にはポートの並び順を確認しておくべきだろう。
    • RAIDデバイスへ新しい物理デバイスの追加
      RAIDデバイスに物理デバイスを追加する前に,正常に稼働している物理デバイスと同じ容量(または大きい容量)になるように新しく交換した物理デバイスのパーティションを切る。長くなってしまうのでパーティションを切る方法はここでは割愛する。
      同じようにパーティションを切ることができたら# mdadm --add [追加先のRAIDデバイス] [追加する物理デバイス]コマンドを用いてRAIDデバイスに追加する。追加した結果を以下に示す。

      # mdadm --add /dev/md125 /dev/sdb2
      mdadm: added /dev/sdb2
      # mdadm --add /dev/md126 /dev/sdb3
      mdadm: added /dev/sdb3
      # mdadm --add /dev/md127 /dev/sdb1
      mdadm: added /dev/sdb1
      # cat /proc/mdstat
      Personalities : [raid1] 
      md125 : active raid1 sdb2[2] sda2[1]
            511936 blocks super 1.0 [2/2] [UU]
            
      md126 : active raid1 sdb3[2] sda3[1]
            1726400 blocks super 1.2 [2/1] [_U]
            [=======>.............]  recovery = 38.3% (661824/1726400) finish=0.3min speed=47273K/sec
            
      md127 : active raid1 sdb1[2] sda1[1]
            6143936 blocks super 1.2 [2/1] [_U]
              resync=DELAYED
            bitmap: 1/1 pages [4KB], 65536KB chunk
      
      unused devices: <none>
    • 新しい物理デバイスにgrub2をインストール
      新しい物理デバイスにはMBRが書き込まれていない,そのため物理デバイスを使用してシステムを起動することができない。MBRを書き込むためのコマンドは# grub2-install /dev/sdbを実行する。
      Installation finished. No error reported.」と表示されれば正常終了。

このようにしてHDDを交換することができる。